Neural networks are becoming more and more sophisticated, entering our lives more and more often and causing more and more controversy. At the end of March 2023, the Midjourney developers closed the free trial access due to abuse of the technology. In this material we will work with a free analogue of Midjourney – the Stable Diffusion neural network. Where to download, how to install and how to work with Stable Diffusion – let’s figure it out in detail.
How to download and install Stable Diffusion
Stable Diffusion is a neural network that can generate images based on a text query (txt2img). It is open source, which means anyone can use it to create beautiful pictures (and even make changes to the code if they know how to program).
It does not work on a remote cloud server, like Midjourney or DALL-E, but directly on the user’s computer. There are advantages to this: you don’t have to pay a subscription, you don’t have to wait in line while the neural network creates pictures for other clients and takes care of your request. There are also disadvantages: not every computer is suitable for running and stable operation of Stable Diffusion. You need a powerful video card and several tens of gigabytes of free disk space. The developers recommend using an Nvidia RTX 3xxx series video card with at least 6 GB of video memory.
We managed to install Stable Diffusion on a computer with more modest parameters: Intel Core i5 4460, 16 GB of RAM, Nvidia GTX 960 video card with 4 GB of memory. True, the neural network did not work very quickly on it.
Where to download Stable Diffusion
There are many different Stable Diffusion builds, differing from each other in interface and degree of difficulties that you will encounter during installation. Easy Stable Diffusion can be considered the most convenient for a novice user. You can download the assemblies from github.com : here is a link to Easy Stable Diffusion .
Run the installation file and begin the installation. During the process, you will be asked where to install the neural network. It is better to create an installation folder in the root of the disk (for example, C:\EasyDiffusion or D:\EasyDiffusion ). This way you definitely won’t have to look for an installed neural network later.
The installation process is not very fast, so pour yourself some tea and a cookie and wait. At the end of the installation, do not forget to check the Create Desktop Shortcut checkbox so that the installer creates a shortcut for quick launch. But it’s too early to launch the neural network, so you should uncheck the Run Easy Diffusion checkbox.

Easy Stable Diffusion installation process – choosing a location, downloading and installing the necessary files, creating a shortcut / Illustration: Alisa Smirnova, Fotosklad.Expert
Now you need to select and download the model. Neural networks for generating pictures have different models, trained to create images in different styles. For example, Midjourney has the standard Midjourney v4 model, the more recent Midjourney v5, which creates more photorealistic images, and the niji•journey model, which generates anime and manga-style images.
Due to its open source nature, Stable Diffusion has many more models: there are models for simulating different artistic styles, for realism, for anime, and for creating architectural sketches. We will use one of the most popular universal models Deliberate 2.0 , it can be downloaded here.
In our Easy Diffusion folder we find the models folder , and in it another stable-diffusion folder . This is where we put the downloaded Deliberate 2.0 model file .

There is a hint in the right folder: here is a text file called Place your stable-diffusion model files here.txt (place your models for stable diffusion here) / Illustration: Alisa Smirnova, Fotosklad.Expert
Now you can launch the neural network. Click on the shortcut and we see something like this:
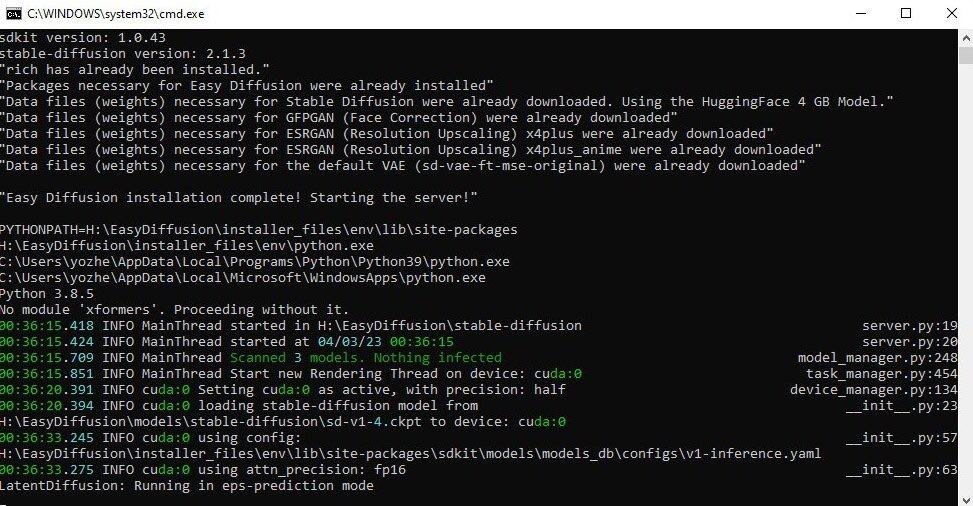
Windows command line window in which Stable Diffusion is running / Illustration: Alisa Smirnova, Fotosklad.Expert
Don’t be scared right away. In about a minute, a browser with a user interface will open, in which communication with our neural network takes place. But the command line window cannot be closed while working with Stable Diffusion; the core of our neural network works there, and the browser contains only a shell that is convenient for working.
This is what the Easy Diffusion user interface looks like in the browser:
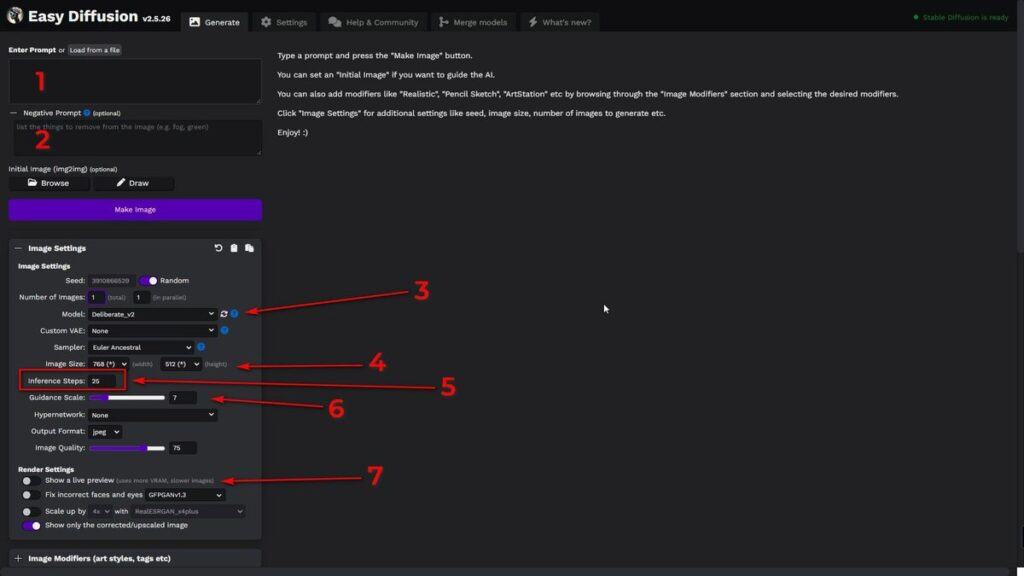
These are the settings that interest us primarily / Illustration: Alisa Smirnova, Fotosklad.Expert
- Prompt field. In it we enter a description of what we want to get in the picture (in English);
- Negative prompt field. Here we write about what should not be in the picture. For example, if you need to generate a mouse with a tail and paws, and the neural network stubbornly puts in a computer mouse, enter Computer mouse in this field;
- The model used for generation (in this case, Deliberate v2);
- Image dimensions, width (width) and height (height);
- Number of generation steps (inference steps). The higher it is, the longer the neural network works on the picture. For a decent result, 16-20 steps are enough; on more powerful computers you can use 20-30;
- Guidance scale slider. It is responsible for how accurately the neural network will follow the request. If set to minimum, Stable Diffusion will get creative and may ignore most keywords. Values greater than 16 are worth using if you are an experienced user and are able to create very accurate detailed descriptions. In most cases, a value of 7-10 will be optimal;
- Switch “show a live preview”. If it is turned on, you will see how the image is generated; if it is turned off, you will see only the finished result.
Computer power and performance Stable Diffusion
A little more technical information before we move on to drawing. The speed of Stable Diffusion depends very much on the video card installed in the computer and the amount of video memory. An important point: when working, the neural network uses CUDA cores, which are only found in NVidia video cards, and it is better to use them.
We had two computers participate in our neural network tests. Most of the images were generated using the top-end Nvidia RTX 4090 graphics card with 24 GB of video memory. Generating 12 images measuring 1024×768 took from 40 seconds to 2 minutes, and enlarging the image four times in 3-4 seconds.
The second computer had a rather old Nvidia GTX 960 4 GB video card (about the same performance as the GTX 1050Ti ), and it was noticeably slower. It cannot cope with the size 1024×768, there is not enough video memory and the task ends with an error. So it generated images twice as small, 768×512 pixels. It took 6-9 minutes to generate four images of this size.
So, if you want to work with this neural network, make sure that your computer has a good video card. For startup and leisurely work, a GTX1050Ti or GTX 1660 Super , or a laptop with a discrete graphics card with 4 GB of video memory or higher (for example, Xiaomi RedmiBook Pro 15″ ) is enough.
And for more comfortable and faster work, you need more powerful video cards with a memory capacity of 8 (or better, 12) gigabytes. For example, GeForce RTX 3050 8GB or GeForce RTX 4070Ti 12GB . As for laptops, on a Lenovo Legion 5 laptop with a 6GB RTX3060 video card, Stable Diffusion should work quite quickly (although 6GB may not be enough to greatly enlarge finished images). But the MSI Stealth GS77 can definitely handle anything: it has an RTX3080Ti 16Gb.
How to generate images in Stable Diffusion: we show it on cats
Let’s take a look at Stable Diffusion in action. We will generate cats, because everyone loves cats. In the prompt field, enter the request photo of cat (we write in English, the neural network is not good with other languages).
We select Deliberate v2 as the model, set the Inference Steps to 25 and increase the Number of images so that the neural network generates 12 pictures for us at once, from which we can choose the best one.
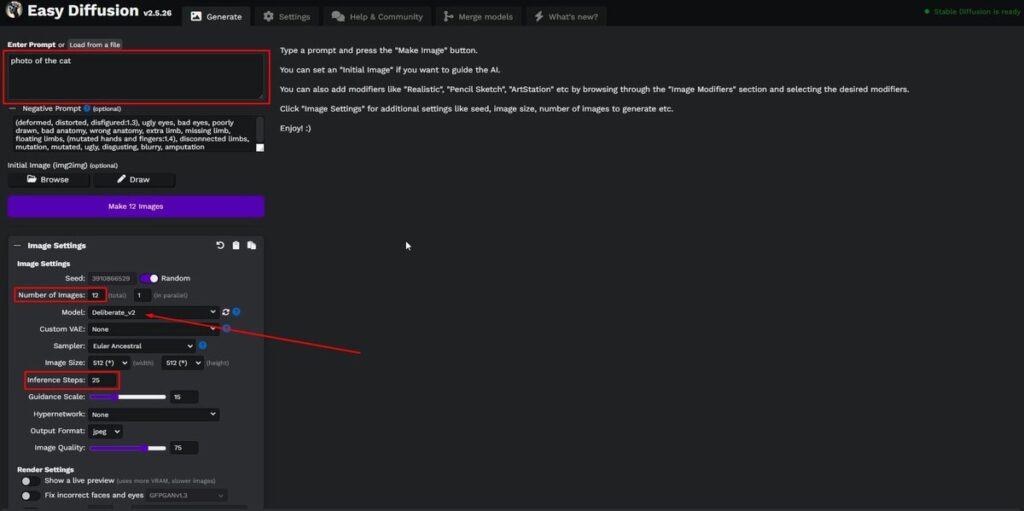
Set the necessary parameters, click Make 12 Images and wait / Illustration: Alisa Smirnova, Fotosklad.Expert
It will take some time for the neural network to work. It depends on the power of the computer. As a result, we got this set of cats.
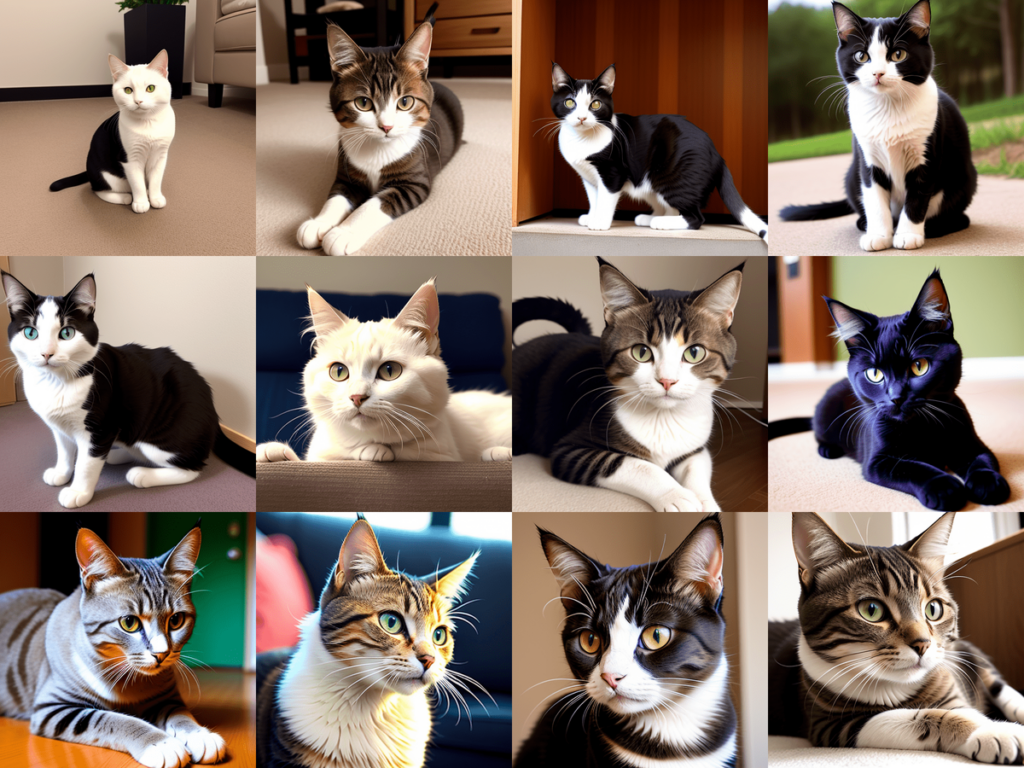
Beautiful, but somehow square / Illustration: Alisa Smirnova, Fotosklad.Expert
Let’s try to make our image format less square. We set the image width (Width) to 1024 pixels, and height (Height) to 768. It is believed that the neural network produces the best result when generating square images of 512×512 pixels, since it was trained on this size. If you need to make rectangular pictures, it is recommended to make one of the sides either equal to 512 pixels, or reduce or increase this value by half, to 256 or 1024 pixels, respectively.
We generate. This time our result consists of two-headed and six-legged cats a little more than completely. This is a typical neural network error when generating rectangular images.
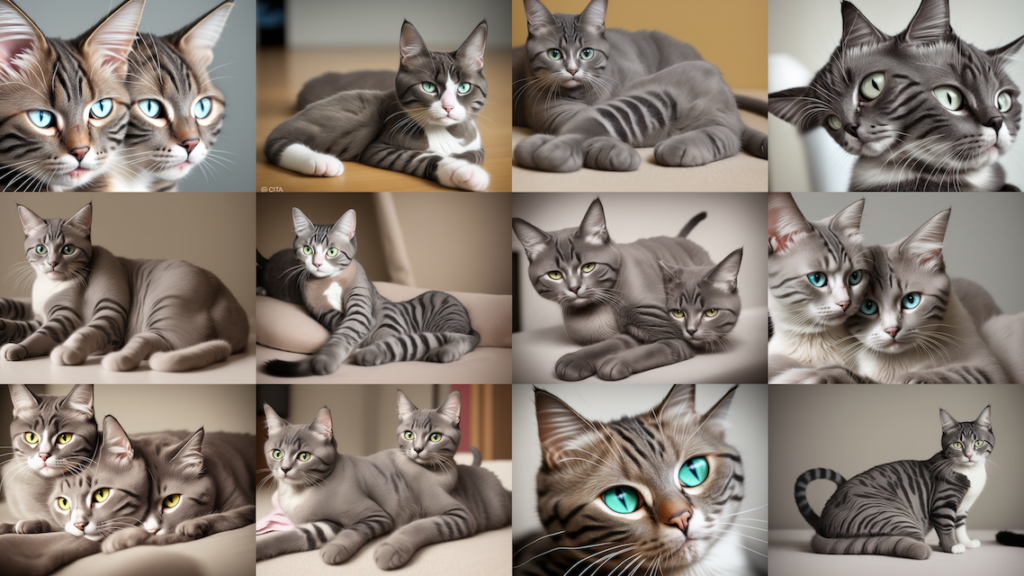
Cats are different. Especially if they are drawn by a neural network / Illustration: Alisa Smirnova, Fotosklad.Expert
You can return to the square format, or you can try to fix this using the Negative Prompt field, in which we add a description of what we do not want to receive in the generation: “deformed, distorted, disfigured, poorly drawn, bad anatomy, wrong anatomy, extra limb, missing limb, floating limbs, mutated hands and fingers, disconnected limbs, mutation, mutated, ugly, disgusting, blurry, amputation” (deformed, distorted, mutilated, poorly drawn, bad anatomy, incorrect anatomy, extra limb, missing limb, distorted limbs, mutated hands and fingers, detached limbs, mutation, mutated, ugly, disgusting, blurred, amputation).
It has become noticeably better.
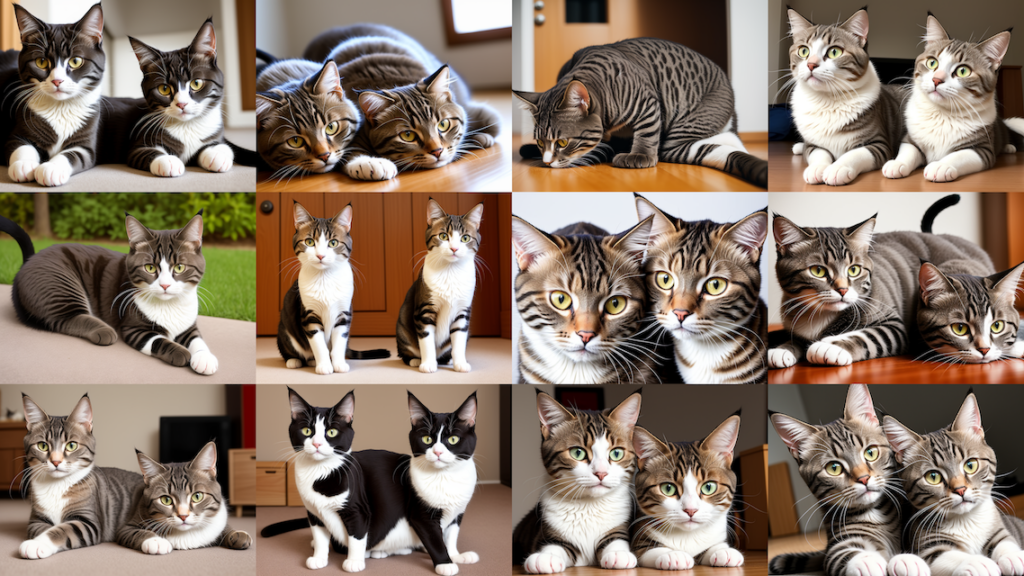
There are only a couple of mutant cats in this generation: catcats in the bottom row on the left – pay attention / Illustration: Alisa Smirnova, Fotosklad.Expert
Now let’s place our cat in an atmospheric place. I think the old library will suit him. We make a request: “photo of cat, sitting on the table, books on the table, medieval windows behind, lancet windows, old library, table lamps, victorian room, stone walls, chandeliers, many books, HDR, sun rays, cinematic light, volumetric light, soft light, photorealistic, perfect composition” / photo of a cat, sitting on the table, books on the table, medieval windows behind, lancet windows, old library, table lamps, Victorian room, stone walls, chandeliers, many books, HDR, solar rays, cinematic light, volumetric light, soft light, photorealistic, perfect composition.
Please note that composing prom for Stable Diffusion is slightly different from how it is done in Midjorney. The Midjorney neural network better understands complex coherent sentences, and in it you can write something like “a cat sitting on a table among books next to a desk lamp in an old Victorian library.” Stable Diffusion better understands individual words or combinations of 2-3 words separated by commas. So compiling a promo for this neural network is similar to describing a photo for a stock photo.
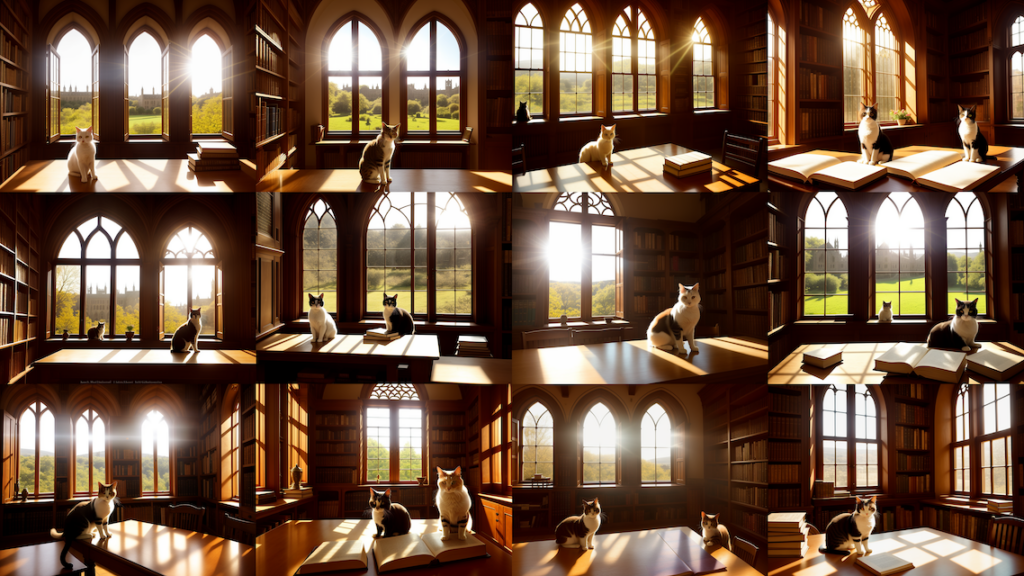
Victorian library cats. Atmospheric, but the cats are a bit small / Illustration: Alisa Smirnova, Fotosklad.Expert
To get a beautiful larger portrait, we will have to slightly modify our request and some settings. The final promt looks like this: “RAW photo, (((close-up))) portrait of the cat, sitting on the table, books on the table, medieval windows behind, lancet windows, old library, table lamps, victorian room, stone walls, chandeliers, many books, HDR, sun rays, god rays, cinematic light, volumetric light, soft light, photorealistic, perfect composition” / RAW photo, (((close-up))) portrait of a cat sitting on a table, books on the table, medieval windows at the back, lancet windows, old library, table lamps, Victorian room, stone walls, chandeliers, many books, HDR, sun rays, divine rays, cinematic light, volumetric light, soft light, photorealistic, perfect composition.
RAW photo was added to the beginning of the description – it is believed that with this keyword the neural network makes more photorealistic images. Instead of photo of the cat (photo of a cat) they put a close-up portrait of the cat (large portrait of a cat) . Pay attention to the brackets around close-up : with their help, we make it clear to the neural network that this parameter is very important for us and it is worth paying more attention to. The more brackets, the greater the “weight” of this parameter in the industrial text. Without brackets, Stable Diffusion did not draw large enough cats, but with three brackets, the cats became much closer to the camera.
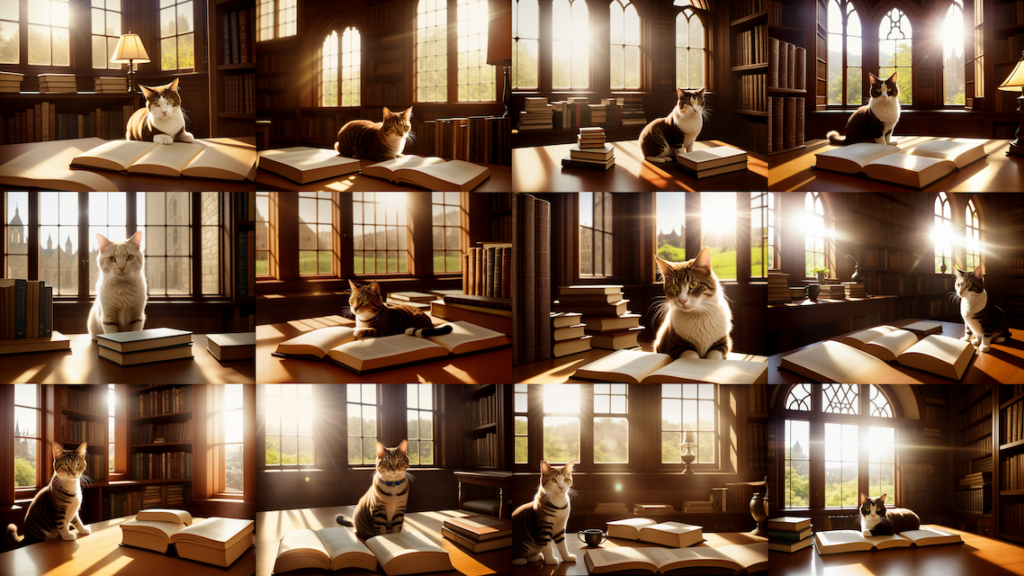
The result of the work based on the new description / Illustration: Alisa Smirnova, Photo warehouse.Expert
During the generation process, we came across cats that had yellow circles in place of their eyes without pupils or with poorly developed pupils. To improve the quality of eyes and get rid of bad options, the items bad eyes, ugly eyes were added to the Negative prompt field to exclude options with bad ugly eyes.
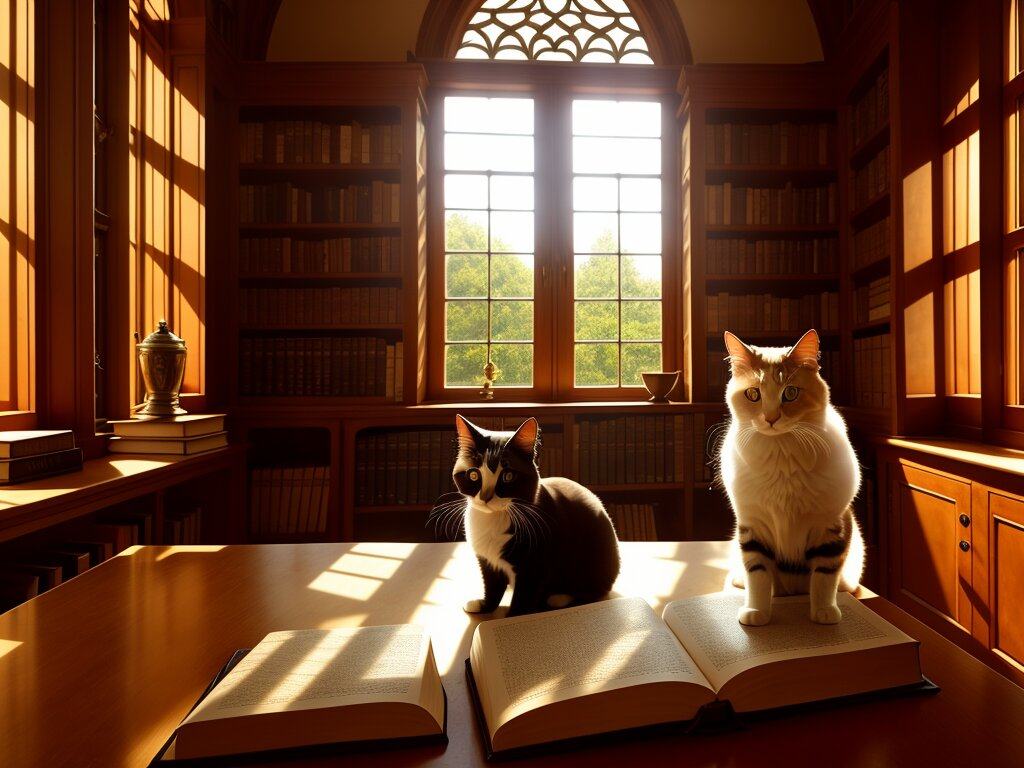
The composition is not bad, but there’s clearly something wrong with the eyes / Illustration: Alisa Smirnova, Fotosklad.Expert
As a result, we have 12 pictures of very cute library cats, two of which are especially good:
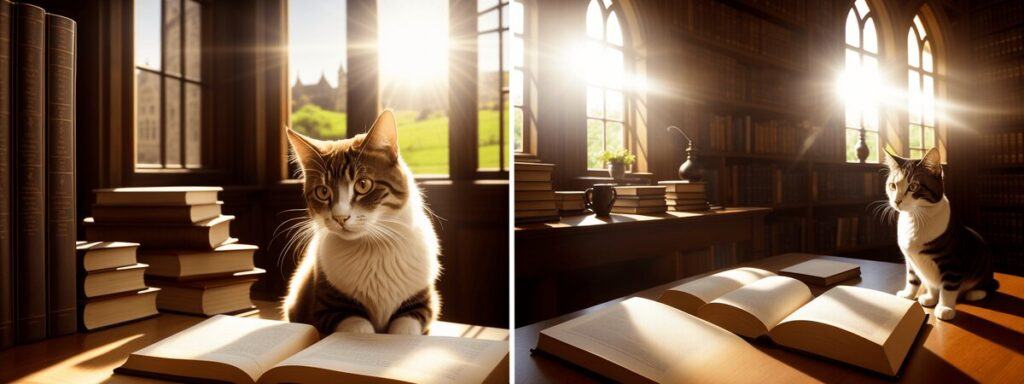
The left picture has a more expressive cat, but the right photo is more atmospheric. The choice is not so simple / Illustration: Alisa Smirnova, Fotosklad.Expert
But an ordinary cat is not very effective at guarding a library. He needs to sleep, eat, and cats in general are unpredictable creatures. Let’s make him a cyborg so that he can protect the library not only from mice, but also from too noisy visitors.
Let’s make the following description: a cat made out of metal, ((cyborg)), (intricate details), hdr, ((intricate details, hyperdetailed)), sitting on the table, steampunk, books on the table, medieval windows behind, lancet windows, old library, victorian room, table lamps, stone walls, sun rays, soft light, photorealistic, perfect composition, cinematic shot / metal cat, ((cyborg)), (complex details), hdr, ((complex details, hyper-detailed)), sitting on a table, steampunk, books on the table, medieval windows at the back, lancet windows, old library, Victorian room, table lamps, stone walls, sun rays, soft light, photorealistic, perfect composition, cinematic frame.
After several attempts, we ended up with not one cat, but two.
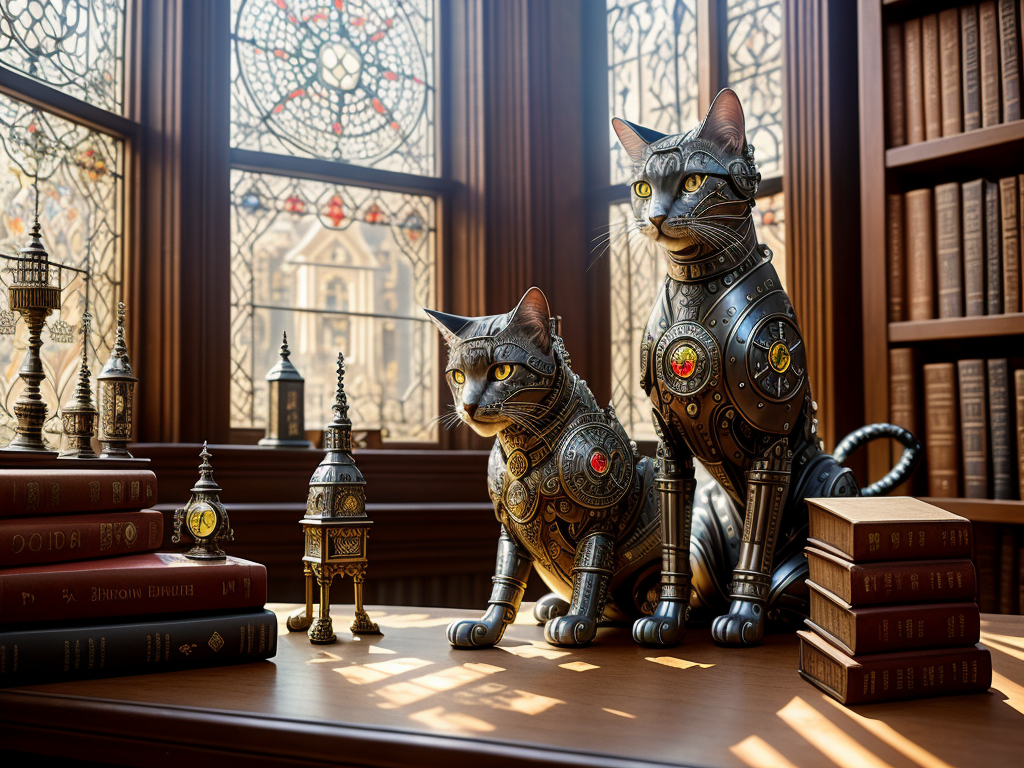
Cyber cats guard order and silence / Illustration: Alisa Smirnova, Fotosklad.Expert
Making several versions of the finished photo in Stable Diffusion
Those who have worked with the Midjourney neural network remember that there are buttons that allow you to generate slightly different versions of the picture you like. Stable Diffusion also has a similar feature.
If you hover your mouse over the image you like, several buttons will appear, including the Make Similar Images button.
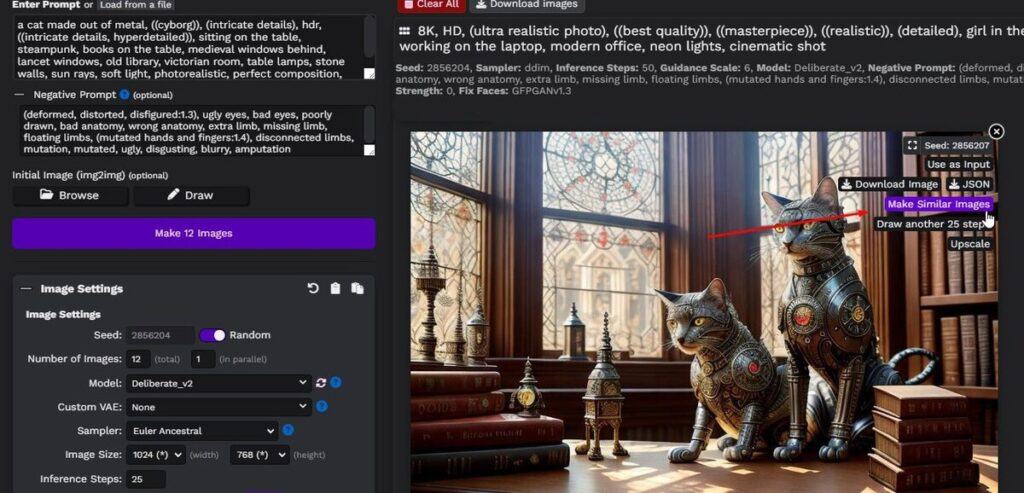
We press the button, and the neural network will generate five more variations with a similar composition, but with different details / Illustration: Alisa Smirnova, Fotosklad.Expert
These are the versions of cats we got. Interesting, but the original picture was still better.
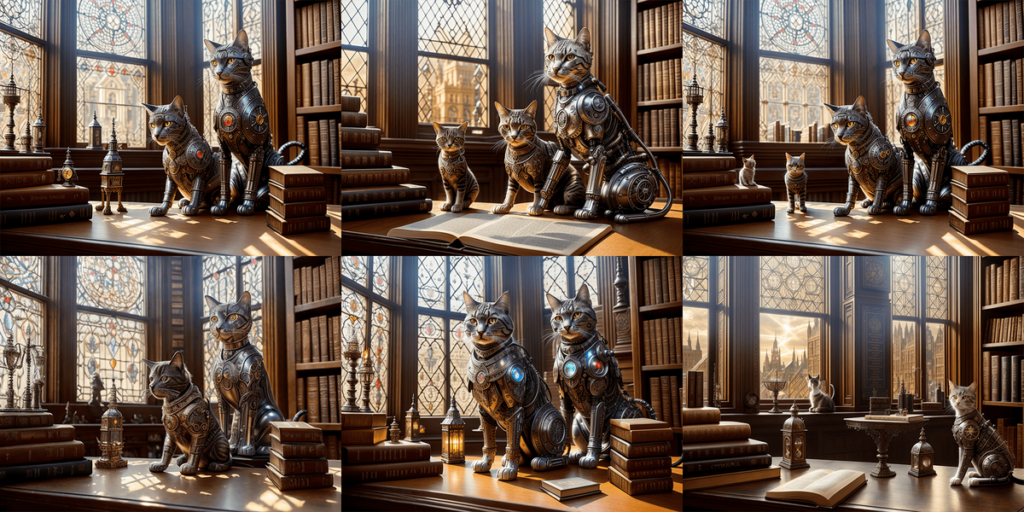
The original picture (top left) and its variations. At some point there were more cats. In one of the photos there are already four of them / Illustration: Alisa Smirnova, Fotosklad.Expert
Enlarge the generated image in Stable Diffusion
Our cats have a size of 1024×768 pixels, which is not so much. It’s enough for Instagram, but you can’t really see it on a large monitor, and it’s not enough for printing. So let’s try to increase the image size. This is done using the same buttons at the top right (move the mouse over the picture for the buttons to appear).
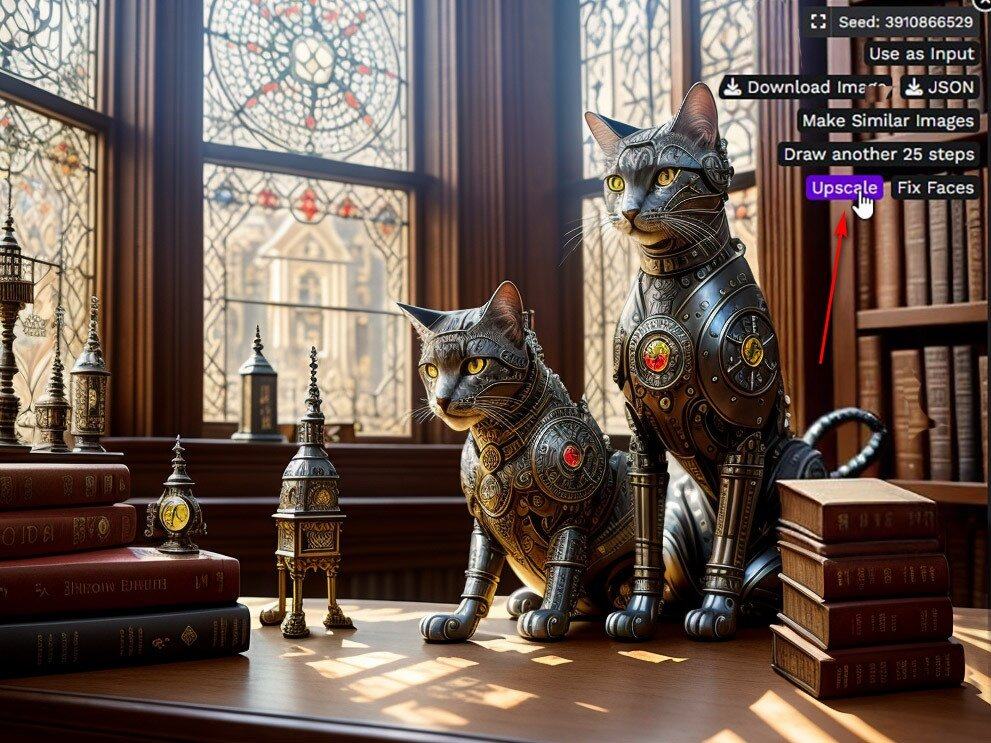
We need an Upscale button / Illustration: Alisa Smirnova, Fotosklad.Expert
Click and wait for Stable Diffusion to enlarge our image. Errors may occur on computers with a weak video card. On our test subject with a GTX 960 4 GB, the increase works every other time. But there’s nothing you can do about it: either try again and again, or change the hardware.
As for the result of the increase, here it is not as impressive as in the same Midjourney. If Midjourney continues to complete the image during enlargement, adding and changing details, then Stable Diffusion simply physically enlarges the image, increasing sharpness and maintaining the smoothness of the lines. Overall, the result of Stable Diffusion’s enlargement is very similar to Topaz Gigapixel.
So, if you have a weak computer and cannot enlarge the generated images directly in Stable Diffusion, you can use the program from Topaz – the result will be no worse.
Using different models to generate images in Stable Diffusion
Before this, we constantly worked on the Deliberate 2.0 model. It is the most common, but there are others. Let’s try them on cats.
Model Stable Diffusion 1.5
A “pure” model from the developer Stable Diffusion, it is on its basis that Deliberate and most other models are trained. Here is the result according to our final description, which we used for cyborg cats.
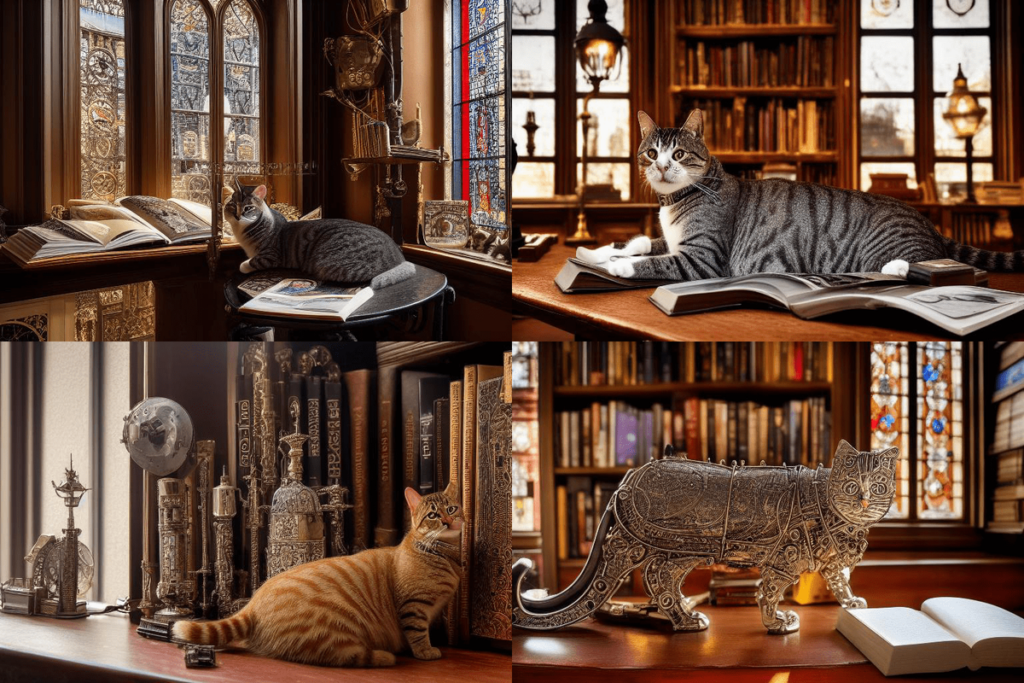
Strange cats with bad eyes, bad work with light. What neural network pictures were associated with just a year or two ago / Illustration: Alisa Smirnova, Fotosklad.Expert
Model Anything V3
The model is trained on anime and manga. Excellent at drawing people. Let’s see what it does with cats.
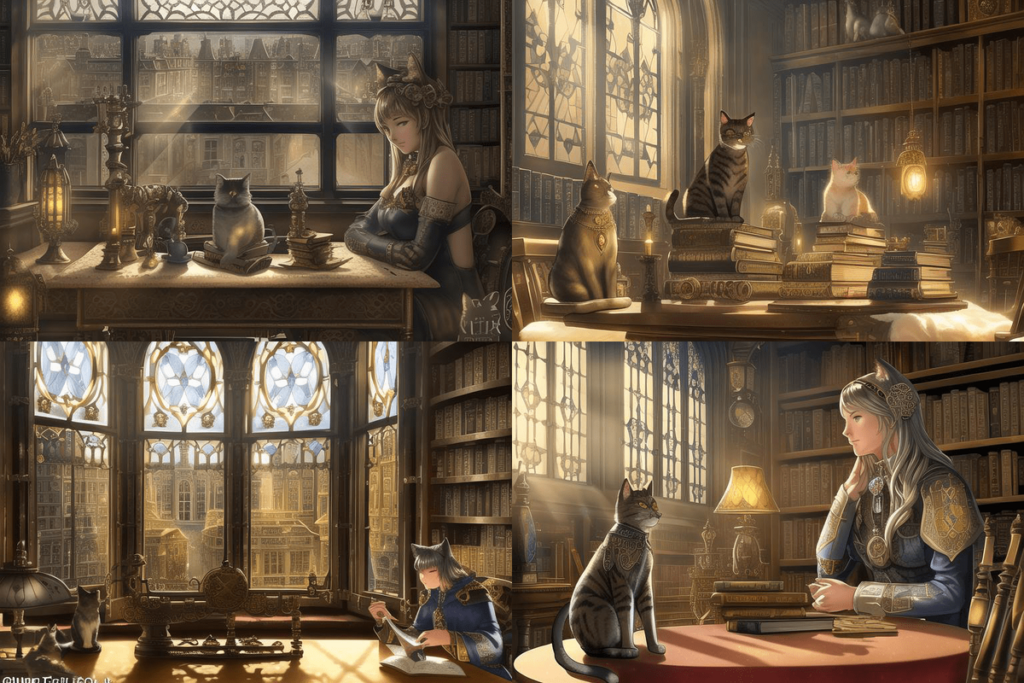
Anime girls appeared spontaneously, but they turned out well, the cats were much worse / Illustration: Alisa Smirnova, Fotosklad.Expert
Model Realistic Vision V2.0
A new model for generating photorealistic images and its result:
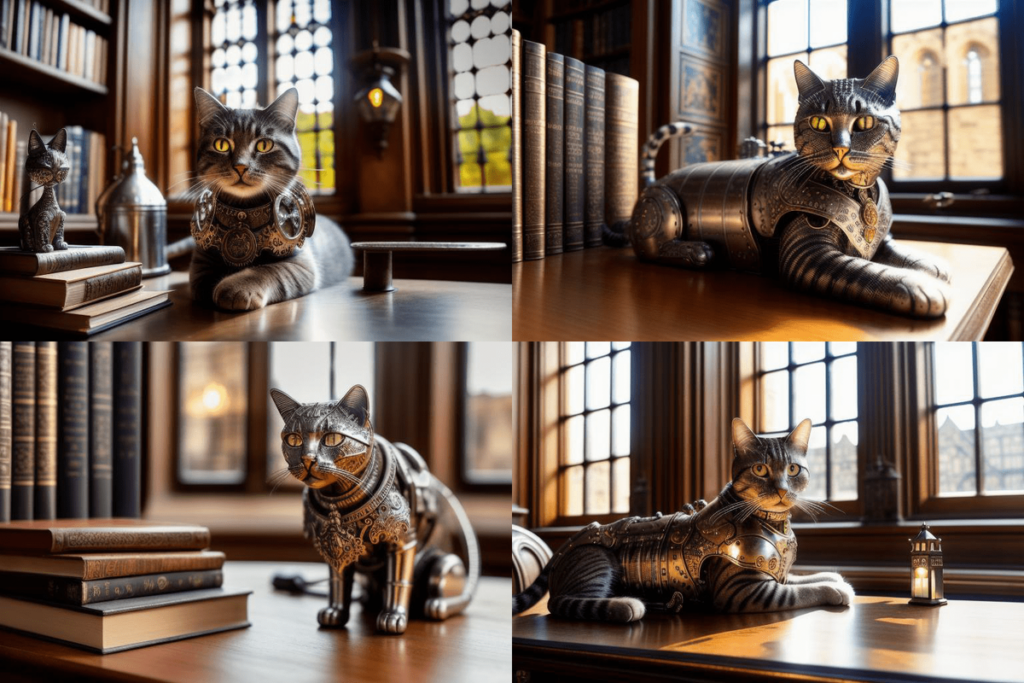
Good work with depth of field and bokeh, realistic cats with almost no eye problems. But the interior and atmosphere were not as expressive as in Deliberate. In general, we recommend installation and use / Illustration: Alisa Smirnova, Fotosklad.Expert
Model Robo Diffusion 1.0
A model trained to draw various robots. In theory, it should be ideal for cyborg cats, but something went wrong.
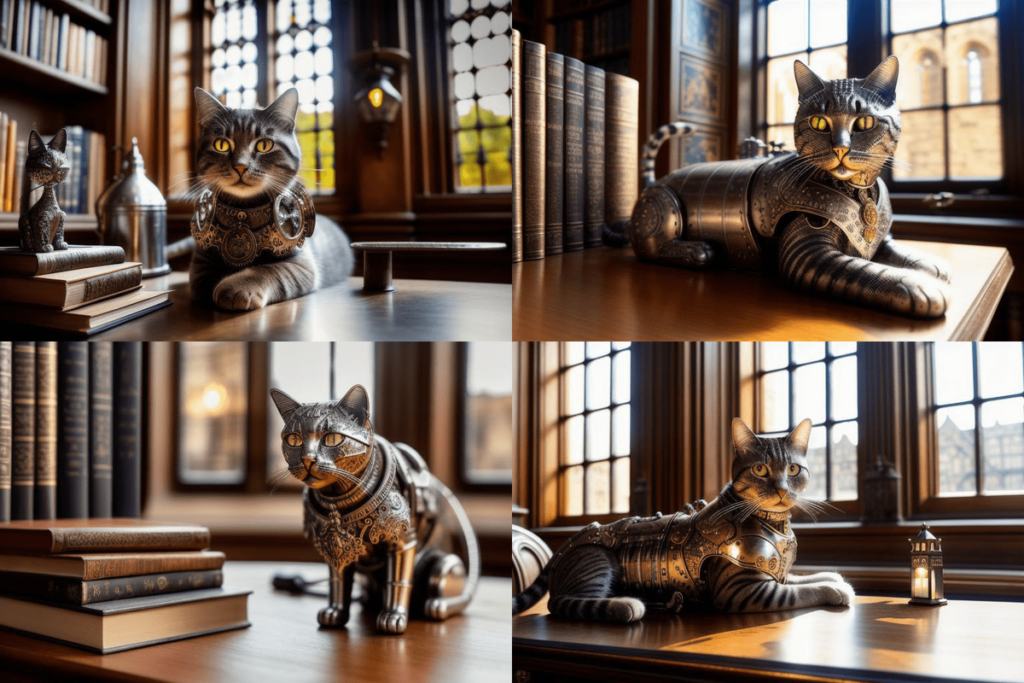
We had high hopes for this model, but it did not live up to them – all the seals are wool, not a single one is metal. Apparently, the model was trained only on huge humanoid combat robots / Illustration: Alisa Smirnova, Fotosklad.Expert


